For me, an old fashioned apple pie is more than just dessert. It is a tradition that reminds me of family gatherings and cozy afternoons at home. Over time, I have learned small tricks from experienced bakers, cookbooks, and helpful forums that make this classic pie turn out perfectly. In this article, I will share this delicious old fashioned apple pie recipe, so you can bake a pie that looks beautiful, tastes amazing, and fills your home with the same comforting aroma.
Key Takeaways
- A Classic Dessert: Old fashioned apple pie is one of those desserts that never goes out of style. It has a flaky crust and a sweet, spiced apple filling that makes every bite comforting and familiar.
- Choosing the Right Apples: The best flavor comes from using more than one type of apple in this recipe for old fashioned apple pie. A mix of sweet and tart apples gives the pie a nice balance and keeps the texture interesting.
- Avoiding a Soggy Bottom: A soggy crust can ruin a good pie. A little cornstarch on the base, thicker apple juices, or a preheated metal baking sheet helps keep the crust crisp and golden.
- Keeping the Dough Flaky: Cold dough is the secret to a flaky crust. Handle it gently and keep it cool so it stays soft and tender after baking.
- Best Ways to Serve: Warm pie tastes wonderful with a scoop of vanilla ice cream, some whipped cream, or a drizzle of caramel sauce. A slice of sharp cheddar cheese adds a classic touch that many people love.
- How to Store It: Apple pie stays fresh for a day or two at room temperature. It can also go in the fridge or freezer if you want to keep it longer.
What Is Old Fashioned Apple Pie?
A Classic Homemade Dessert
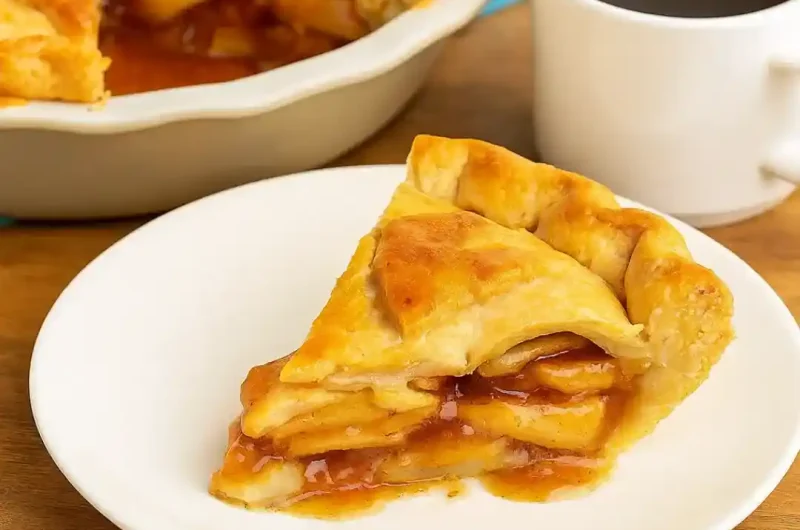
An old fashioned apple pie is a traditional two-crust pie filled with sliced apples that mix with sugar and warm spices. It has a full top crust that covers the filling completely, helping the apples soften and release their juices as the pie bakes. The result is a tender, flavorful apple filling inside a golden, flaky crust. This timeless dessert has been part of North American kitchens for centuries. It began with English pie traditions brought by early settlers and slowly evolved as people used local apple varieties to create their own versions.
Why It Stands the Test of Time
Apple pie stays popular because it feels comforting and familiar. The mix of sweet and tart apples with gentle spices brings the taste of fall and the warmth of family gatherings. The ingredients are simple and easy to find, which makes the old fashioned apple pie recipe perfect for any home baker. The process of rolling the dough, layering the apples, and shaping the edges feels calm and satisfying. Every pie carries a sense of tradition and care that turns an ordinary day into a special occasion. I can say this is one of the best old fashioned apple pie recipe that you shall ever try.
Old Fashioned Apple Pie Recipe
Course: DessertCuisine: American8
servings30
minutes50
minutes450
kcalLearn how to make a classic old fashioned apple pie with a flaky crust and sweet apple filling. Simple ingredients, easy steps, and rich homemade flavor.
Ingredients for Old Fashioned Apple Pie
For the Pie Crust
2½ cups all-purpose flour
1 teaspoon fine sea salt
1 tablespoon granulated sugar
1 cup unsalted butter, chilled and cut into ½-inch cubes
6 to 8 tablespoons ice water
For the Apple Filling
6 to 7 medium apples, peeled, cored, and thinly sliced
¾ cup granulated sugar
2 to 3 tablespoons brown sugar
¼ cup cornstarch or 3 tablespoons all-purpose flour
1 teaspoon ground cinnamon
¼ teaspoon ground nutmeg
Pinch of ground allspice or cloves
Zest and juice of 1 lemon
1 tablespoon cold unsalted butter, cut into small bits
Optional Toppings
1 large egg beaten with 1 tablespoon milk
Coarse sugar or turbinado sugar for sprinkling
Vanilla ice cream, whipped cream, caramel sauce, or sharp cheddar cheese for serving
How to Make Old Fashioned Apple Pie Step by Step
- Prepare the Pie Dough: First, mix the flour, salt, and sugar in a large bowl. Add the cold butter cubes and press them into the flour with your fingers or a pastry blender. Stop when the mixture looks crumbly and you can still see small bits of butter. Those tiny butter pieces help make the crust flaky later. Pour six tablespoons of ice water over the mixture. Mix it gently with a fork. If the dough feels dry, add a little more water, one spoon at a time, until it comes together. Do not mix too much because that can make the crust tough. Place the dough on your work surface and divide it into two parts. Make one piece a little bigger for the bottom crust. Flatten both pieces into discs, wrap them, and put them in the fridge for at least one hour. Chilling helps the dough rest and keeps the butter firm for a soft, flaky crust.
- Slice and Season the Apples: Next, prepare the apples while the dough chills. Use a mix of apples for better flavor. Sweet apples like Golden Delicious or Fuji balance well with tart ones like Granny Smith or Braeburn. Slice the apples thin so they cook evenly. Put the apple slices in a large bowl. Add both sugars, cornstarch, cinnamon, nutmeg, a little allspice if you like, and the zest and juice of one lemon. Mix everything gently until the apples are coated. The cornstarch helps the filling thicken while baking so the pie does not turn watery.
- Roll Out and Fill the Crust: Take the larger disc of dough from the fridge. Dust your surface with a little flour and roll the dough into a circle about twelve inches wide and thin enough to fit a nine-inch pie dish. Gently lift it and place it into the dish. Press the dough softly into the corners and let a little hang over the sides. If you want to keep the crust extra crisp, sprinkle a bit of flour or cornstarch on the bottom. Spoon the apple filling into the crust. Leave most of the extra liquid in the bowl. Pile the apples a little higher in the center since they shrink while baking. Add small pieces of butter on top of the apples for extra flavor.
- Add Top Crust and Seal the Edges: Roll out the second piece of dough. You can keep it whole or cut it into strips for a lattice pattern. Place the top crust over the apples. Trim the extra dough so about half an inch hangs over the rim. Tuck the edges under and press them gently with your fingers or a fork to seal the pie. Cut small slits in the top so steam can escape. Brush the surface with the beaten egg and milk mixture. Sprinkle a little sugar on top for a golden, crunchy crust.
- Bake Until Golden and Bubbly: Put a baking sheet on the middle rack of your oven and heat it to 425°F. A hot sheet helps the bottom crust bake evenly. Place the pie on the sheet and bake it for fifteen minutes. The high heat helps the crust rise and set. Lower the oven temperature to 375°F and bake for another forty to fifty minutes. Cover the edges with foil if they brown too quickly. The pie is ready when the crust looks golden and the filling bubbles through the top.
- Cool Slightly Before Serving: Take the pie out of the oven and place it on a wire rack. Let it cool for at least two hours before cutting. Cooling helps the filling thicken so the slices stay neat. Serve the pie warm or at room temperature with ice cream, whipped cream, or any topping you like.
Nutrition Facts
8 servings per container
- Amount Per ServingCalories450
- % Daily Value *
- Total Fat 18.2g 24%
- Saturated Fat 10.8g 54%
- Trans Fat 0.5g
- Cholesterol 47mg 16%
- Sodium 180mg 8%
- Total Carbohydrate 49g 18%
- Dietary Fiber 2.5g 9%
- Total Sugars 25g
- Protein 3.5g 8%
- Potassium 135mg 3%
* The % Daily Value tells you how much a nutrient in a serving of food contributes to a daily diet. 2,000 calories a day is used for general nutrition advice.
More Recipes You’ll Love
Also check out the delicious recipe of Raspberry Swirl Cheesecake .
Expert Chef Tips
Best Apple Varieties for Baking
Different apples bring their own levels of sweetness, tartness, and texture to a pie. The best flavor comes from mixing a few types together. Golden Delicious adds buttery sweetness, Braeburn or Northern Spy gives a tart note and firm texture, while McIntosh or Jonathan melts slightly for a smooth, sauce-like finish.
If you want to use just one kind, Braeburn or Golden Delicious work beautifully because they stay firm yet tender and have a classic apple taste. Grocery store favorites like Fuji, Honeycrisp, and Pink Lady also bake well, but combining them with more flavorful apples makes the pie even better.
How to Avoid a Soggy Bottom Crust
A soggy crust can spoil an otherwise perfect pie. These simple tricks help keep the base crisp and golden.
- Thicken the juices: Coat the apple slices with cornstarch or flour before adding them to the crust. This step absorbs extra liquid and keeps the filling smooth.
- Pre-cook or reduce the filling: Some bakers like to cook the apples a little before baking the pie or let them sit with sugar so the juices release. You can then drain or thicken those juices before assembling the pie.
- Protect the base: Sprinkle a small amount of cornstarch or crushed cookie crumbs on the crust before adding the apples. This thin layer acts like a shield between the fruit and pastry.
- Use metal or glass pans: Metal heats quickly, which helps the bottom crust bake through evenly. Glass dishes are also great because you can watch the crust turn golden as it bakes.
- Preheat a baking sheet: Place a metal baking sheet in the oven while it preheats, then set the pie directly on it. The extra heat helps the base start baking right away and keeps it firm.
Tricks for a Flaky, Buttery Pastry
A good crust makes a big difference in the final pie. Here are a few simple habits that lead to soft, flaky pastry every time.
- Keep ingredients cold: Cold butter and water are key to flakiness. When the cold butter melts in the oven, it creates steam that forms delicate layers in the crust.
- Handle the dough gently: Mix the dough only until it comes together. Working it too much can make it tough instead of tender.
- Leave visible butter pieces: Small chunks of butter in the dough melt during baking and create air pockets that make the crust light and crisp.
- Rest the dough: Let the dough chill in the fridge for at least an hour. This helps relax the gluten and keeps the butter solid, which improves texture.
- Bake cold dough in a hot oven: Cold dough bakes up flakier because the butter melts slowly. A hot oven helps the crust set quickly and prevents it from shrinking.
Serving Suggestions
Serve Warm with Vanilla Ice Cream
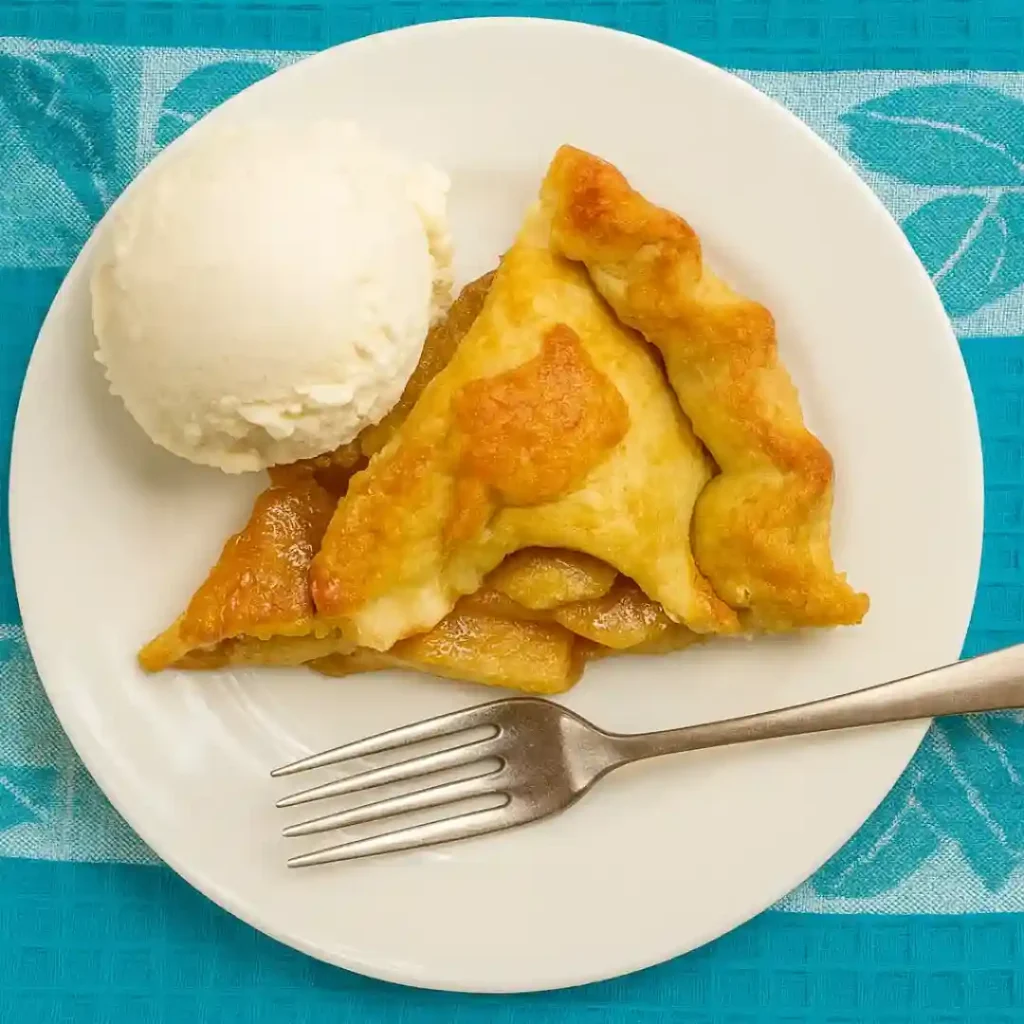
The best way to enjoy apple pie is warm from the oven with a scoop of vanilla ice cream on top. The mix of hot pie and cold ice cream feels comforting and delicious. The crisp crust and creamy ice cream make a perfect match. To reheat leftover slices, place them in a 300°F oven for about fifteen minutes to bring back the flaky texture before adding ice cream.
Pair with Whipped Cream or Caramel Sauce
A spoonful of freshly whipped cream or a drizzle of caramel sauce adds extra flavor without taking away the taste of the apples. To make whipped cream, beat cold heavy cream with a little sugar and vanilla until soft peaks form. For caramel sauce, melt sugar until it turns amber, then whisk in butter and cream. Both toppings can be made early and kept in the fridge until serving.
For a savory and sweet twist, try apple pie with a slice of sharp cheddar cheese. This pairing started in England centuries ago and became popular in parts of New England and the Midwest. The salty cheese brings out the bright flavor of the apples and gives the pie a classic old-fashioned charm.
Make-Ahead Tips
Can You Prepare Apple Pie in Advance?
Yes, you can prepare apple pie ahead of time, and it makes baking days much easier. A baked apple pie stays fresh at room temperature for up to two days when covered loosely with foil or a pie dome. After that, keep it in the refrigerator, where it will stay good for another two days. When you are ready to serve, let the pie sit at room temperature or warm it gently in the oven until soft and fragrant.
If you prefer to prepare the pie without baking it right away, assemble the unbaked pie and place it in the refrigerator for up to two days. Wrap it tightly so the dough does not dry out. When you are ready to bake, take the pie out and let it rest on the counter for about twenty minutes to remove the chill before placing it in the oven.
How to Freeze Baked or Unbaked Apple Pie
For baked pies, allow the pie to cool completely, then wrap it well in plastic wrap and a layer of foil. Place the wrapped pie in a freezer-safe bag or airtight container. It will stay good in the freezer for two to three months. When you want to serve it, thaw the pie overnight in the refrigerator and warm it in a 350°F oven for thirty to forty-five minutes until heated through.
For unbaked pies, place the pie in the freezer until the crust becomes firm. Once firm, wrap it tightly and return it to the freezer. Bake the frozen pie straight from the freezer without thawing, but add about fifteen to twenty minutes to the baking time. This helps prevent the filling from soaking into the crust and keeps the texture light and crisp.
Nutritional Notes
Comfort Food with Natural Fruit Sweetness
Apple pie feels rich and comforting, yet it still carries some natural benefits from its main ingredient. Apples provide fiber, vitamin C, and gentle natural sweetness. A slice that weighs about 136 grams usually contains around 450 calories, with about 24 grams of fat and 55 grams of carbohydrates.
Balancing Indulgence and Freshness
A few small choices can make apple pie lighter without changing its charm. A little less sugar or a touch of honey or maple syrup adds sweetness in a softer way. Smaller slices paired with fresh fruit create a nice balance between freshness and indulgence. The real joy of old fashioned apple pie comes from the love and effort behind it. So, try this good old fashioned apple pie recipe and let us know how it turned out.
FAQs
What are the best apples for old fashioned apple pie?
The best apples for old fashioned apple pie are Granny Smith, Honeycrisp, Braeburn, and Golden Delicious. These apples stay firm while baking and give a mix of sweet and tart flavor. Many bakers also combine two or more types to balance taste and texture.
Do I need to peel the apples?
Peeling is optional, but most people prefer peeled apples for a soft and smooth filling. Unpeeled apples add more fiber and color but make the filling slightly chewy. If you want a classic texture, peeling the apples works best.
Can I use store-bought crust instead of homemade?
Yes, you can use a store-bought crust. It saves time and still makes a tasty pie. A homemade crust offers more buttery flavor, but both options work well.
How do I stop the filling from being too runny?
You can stop the filling from being too runny by adding one to two tablespoons of cornstarch or flour to the apples before baking. These ingredients thicken the juices as they cook. Leave any extra liquid in the mixing bowl instead of pouring it into the crust, as that liquid makes the pie soggy.
Can I make this pie without sugar?
Yes. Replace sugar with natural sweeteners like honey or maple syrup for a lighter taste. Sweet apple varieties such as Fuji, Gala, or Honeycrisp also keep the pie flavorful without added sugar.
How long does homemade apple pie last?
Homemade apple pie stays fresh for up to two days at room temperature when covered loosely with foil. After that, keep it in the refrigerator, where it stays good for another two to three days.
Can I reheat apple pie without drying it out?
Yes. Reheat the pie in a 300°F oven for about fifteen minutes to keep the filling soft and the crust crisp. The oven warms it evenly, while the microwave often makes the crust soggy.
If you liked this recipe, try our

I’m a sweet chef who loves creating irresistible cakes, pastries, and sweet treats. When I’m not baking, you’ll find me experimenting with new flavors, enjoying a good cup of coffee, and sharing my passion for desserts with the world.