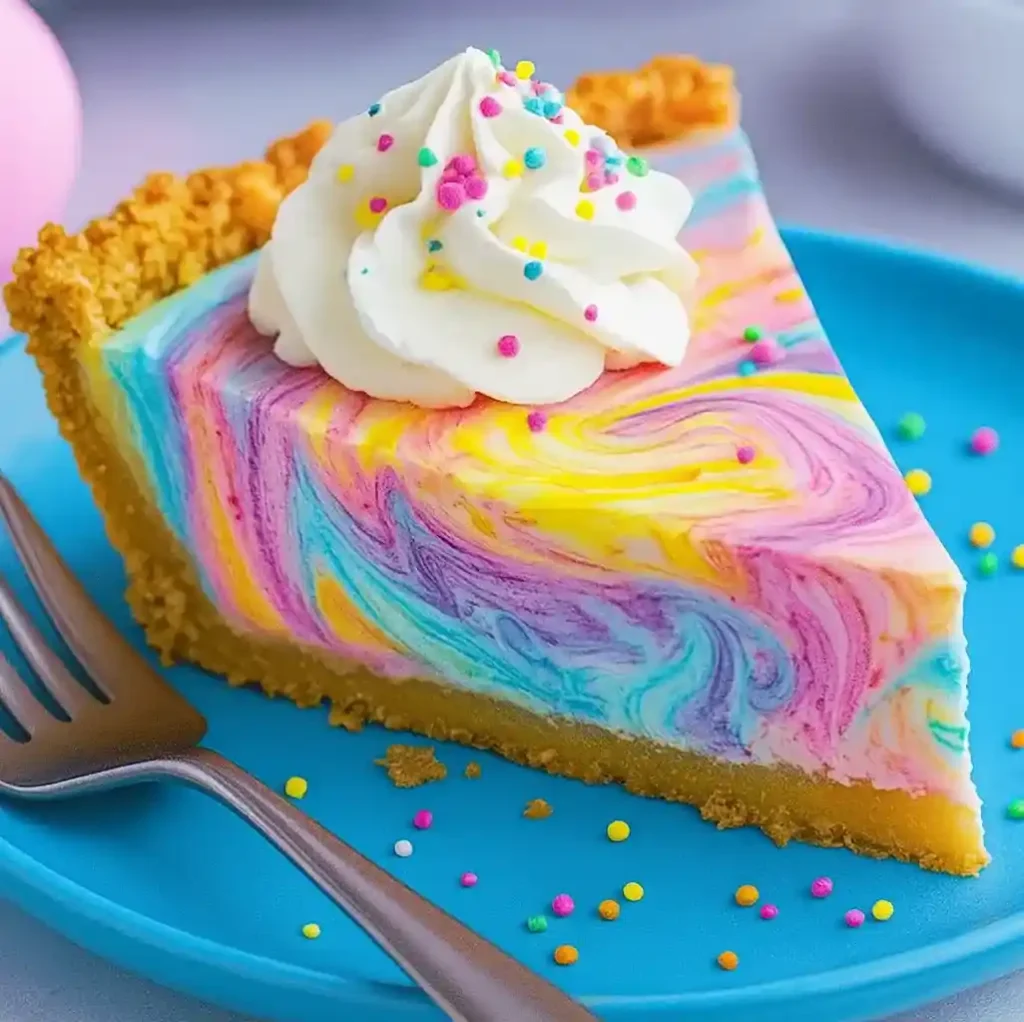
Spring is in the air, and with it comes a craving for colorful, cheerful treats. One of my absolute favorites this time of year is Easter Swirl Pie. This pie is a showstopper. It is light, creamy, and bursting with swirls of pastel colors that instantly brighten up the table. The best part is that it is completely no-bake. That means no oven, no stress, just easy mixing and chilling.
I still remember the first time I made this easter swirl pie recipe for our family’s Easter gathering. Everyone was amazed by the soft swirls of pink, yellow, blue, and purple. It looked like a dessert straight out of a fairy tale. But once we all took a bite, the magic really happened. The creamy texture, balanced sweetness, and buttery graham cracker crust made it unforgettable.
Whether you are an experienced home baker or just looking for a simple Easter dessert, this easter swirl pie recipe fits the bill. I will guide you through what it is, why it works so well, and each step you need to make your own version a success. Along the way, I will also share helpful tips from my own experience to make sure it turns out just right.
Key Takeaways
- No-Bake Ease: You do not need an oven for this easter swirl pie recipe. The pie sets beautifully in the fridge, which makes it easy to prepare and perfect for warm spring days.
- Festive and Eye-Catching: The pastel swirls make this pie a stunning centerpiece. It looks bright, cheerful, and instantly grabs attention at any spring or Easter gathering.
- Simple Ingredients: You only need basic ingredients like cream cheese, heavy cream, sugar, and graham crackers. A few drops of food coloring add the magic. There is nothing hard to find.
- Kid-Friendly Fun: Children love helping with the swirling part. It is a safe and fun activity since there is no baking involved and no hot surfaces to worry about.
- Make-Ahead Convenience: This pie sets best when chilled overnight. That makes it ideal for prepping ahead, saving time on the day of your celebration.
H2: What Is Easter Swirl Pie
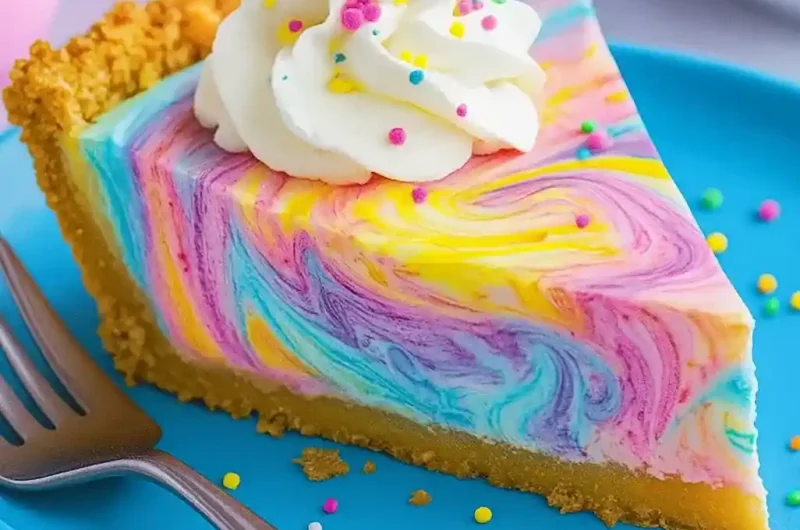
Easter Swirl Pie is a no-bake, creamy dessert that combines a light cheesecake-style filling with beautiful pastel colors swirled into a graham cracker crust. The swirl effect is made by dividing the cream cheese mixture, tinting it with soft spring colors, and gently swirling it together before chilling. It looks playful and festive, like a tie-dye Easter egg, and the texture is smooth and mousse-like with a sweet, buttery crunch from the crust. This pie is a fun, eye-catching treat that feels special but is easy enough for anyone to make.
Why You’ll Love Easter Swirl Pie
I’m biased because I truly adore this recipe for easter swirl pie, but I have a feeling you’re going to love it for many of the same reasons I do. Here are a few compelling reasons to try this delightful dessert:
- Zero Baking Required: You get a fabulous pie without ever turning on the oven. This is a huge plus, especially if your oven is busy with other dishes or if it’s a warm day. I love that I can make this with just my fridge and mixer – it keeps things cool and simple.
- Show-Stopping Appearance: The pastel swirls create a beautiful marbled pattern that makes this pie look professionally made. It’s always the star of the dessert table. I’ve had guests hesitate to cut into it because it’s so pretty (don’t worry, they always devour it once they get a taste!). If you want a dessert that brings out the “Wow, did you really make that?!” reactions, this is it.
- Fun to Make (Especially with Kids): Swirling the colors is honestly my favorite part – it brings out your inner artist. When I make this with my kids, they get so excited choosing colors and swirling the filling around. It’s a great way to involve family or friends in the kitchen.
- Creamy & Delicious Flavor: Beyond the looks, the taste is dreamy. The filling is light, fluffy, and creamy with a lovely vanilla flavor (and a subtle sweetness from the condensed milk). It’s not as heavy as a traditional baked cheesecake, which means even after a big Easter dinner, a slice of this pie feels just right. The buttery graham cracker crust adds a nice buttery, honeyed note to each bite.
- Make-Ahead Friendly: This pie needs a few hours to chill, which conveniently means you can (and should) make it ahead of time. I usually prepare it the evening before our celebration. Knowing dessert is already taken care of is a relief on the holiday. Plus, I find that the flavors meld even better after chilling overnight.
Versatile and Adaptable: While it’s called Easter Swirl Pie, you can easily adapt it for other occasions. Love the concept? Try red and green swirls for Christmas, or shades of orange for Halloween – the basic recipe for easter swirl pie stays the same. Once you’ve made it, you’ll see how easy it is to play around with colors and even flavors (a drop of almond extract or a swirl of strawberry puree can transform the profile). It’s a recipe you can come back to whenever you want a fun, pretty dessert.
Peanut Butter Cup Dump Cake
Course: PieCuisine: AmericanDifficulty: Easy8
servings20
minutes330
kcalThis easy peanut butter cup dump cake recipe blends chocolate, peanut butter, and candy into one gooey dessert. Ready in under an hour and perfect for any crowd.
Ingredients for Easter Swirl Pie
For the Crust:
Graham cracker crumbs – 2½ cups
Unsalted butter, melted – ½ cup
Granulated sugar – 2 tablespoons
For the Filling:
Cream cheese, softened – 8 oz
Heavy whipping cream – 1 cup
Powdered sugar – ½ cup
Vanilla extract – 1 teaspoon
Sweetened condensed milk – ½ cup
Gel food coloring (pink, blue, yellow, purple) – a few drops each
Toppings (Optional):
Whipped cream
Easter sprinkles
Mini chocolate eggs or candies
How to Make This Easter Swirl Pie
- Prepare the Crust: In a medium bowl, mix graham cracker crumbs, melted butter, and sugar until the texture feels like wet sand. Press this mixture evenly into the bottom and sides of a 9-inch pie dish. Use the bottom of a measuring cup to help flatten and pack the crust tightly. Place the crust in the fridge to chill for at least 15 minutes while you make the filling.
- Mix the Filling: In a large mixing bowl, beat the softened cream cheese until completely smooth. Add powdered sugar, vanilla extract, and sweetened condensed milk, and beat again until the mixture is thick and creamy. In a separate bowl, whip the cold heavy cream until stiff peaks form. Gently fold the whipped cream into the cream cheese mixture using a spatula until fully combined and fluffy.
- Color and Swirl the Filling: Divide the filling evenly into separate bowls (based on how many pastel colors you want). Add a drop or two of gel food coloring to each bowl and stir until the color is smooth. Spoon dollops of each color randomly into the prepared crust. Once the crust is full, gently swirl the colors together with a toothpick or skewer. Make sure not to overmix to preserve the marbled effect.
- Chill and Decorate: Refrigerate the pie for at least 4 hours, or overnight for best results. Once chilled and set, decorate the top with whipped cream, Easter sprinkles, and mini chocolate eggs or candies.
- Serve: Slice with a sharp knife, wiping it clean between each cut. Serve cold and enjoy those beautiful pastel swirls in every creamy, sweet bite.
Expert Cooking Tips
- Soften the Cream Cheese: Make sure your cream cheese is at room temperature before you start. Cold cream cheese creates a lumpy filling. Let it sit out for about 30 minutes so it blends smoothly.
- Avoid overmixing: Stir the batter just until everything comes together. A few lumps are fine. Overmixing can make the chocolate peanut butter dump cake dense instead of soft and fudgy.
- Use Gel Food Coloring (or Adjust if Using Liquid): Gel food coloring adds bright color without thinning the filling. If using liquid food coloring, use a toothpick to swirl in small amounts. Too much liquid can loosen the filling, so be cautious.
- Do Not Skimp on Chill Time: Let the pie chill for at least 4 hours so the filling sets properly. If short on time, chill for 3 hours and place in the freezer for the final 30 minutes, but do not leave it frozen too long.
- Make Ahead for Ease: You can prepare the pie a day or two in advance. Just cover it tightly and decorate before serving. The flavor improves with time, and the texture firms up beautifully.
- Press the Crust Firmly: Take time to press the crust down well, especially along the edges. Use a flat-bottomed glass or measuring cup to compact it tightly for clean, sturdy slices.
- Cleanup Tip: Wear gloves while mixing colored fillings to avoid stained hands. Wipe spills immediately, and use lemon juice or vinegar to clean food coloring from countertops if needed.
Nutrition Facts
8 servings per container
- Amount Per ServingCalories330
- % Daily Value *
- Total Fat 26g 34%
- Saturated Fat 15g 75%
- Trans Fat 0g
- Cholesterol 60mg 20%
- Sodium 200mg 9%
- Total Carbohydrate 42g 16%
- Dietary Fiber 0.5g 2%
- Total Sugars 32g
- Protein 4g 8%
* The % Daily Value tells you how much a nutrient in a serving of food contributes to a daily diet. 2,000 calories a day is used for general nutrition advice.
More Recipes You’ll Love
Also check out the delicious recipe of Pineapple Coconut Dream Cake
Storage & Meal Prep Tips
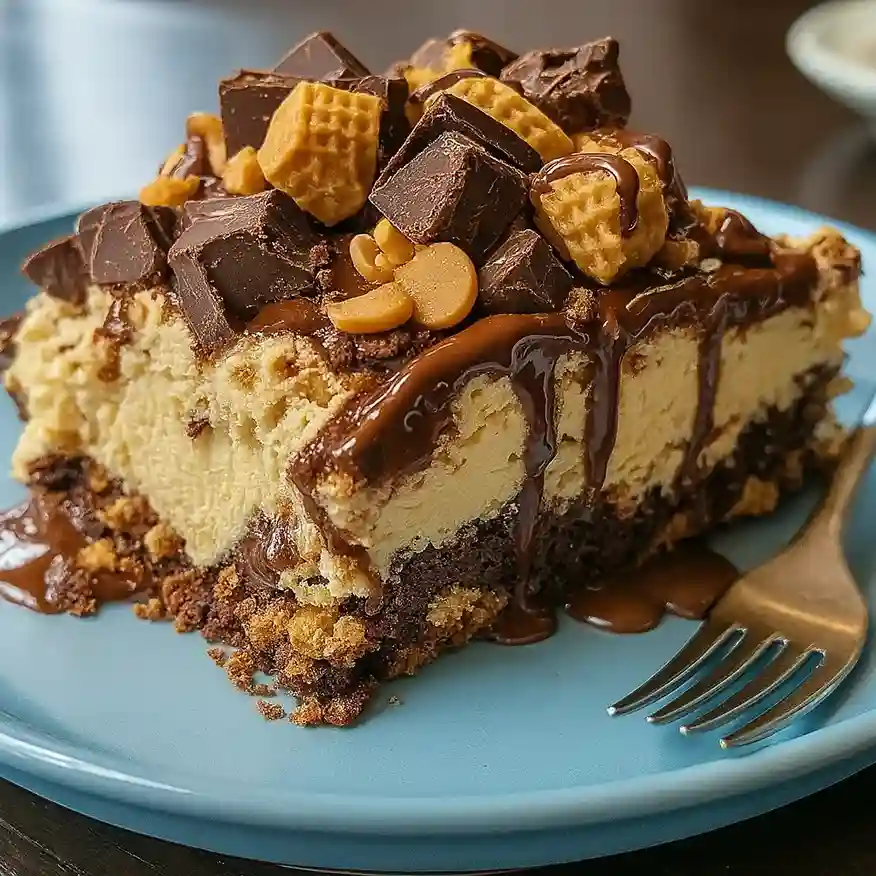
Have you made more chocolate peanut butter dump cake than you can finish in one sitting? No worries – this peanut butter cup dump cake stores well. Here’s how to store leftovers and even make parts of it ahead:
- Storing Leftovers: To keep the cake moist and fresh, store any leftovers in an airtight container. You can keep it at room temperature for up to 2–3 days (assuming your kitchen isn’t too hot). If you still have cake after a couple days, transfer it to the fridge to extend its life. In the refrigerator, it will stay good for about a week. (Just be sure it’s wrapped or in a sealed container so it doesn’t dry out or absorb fridge odors.) The cake may firm up a bit in the fridge because of the peanut butter and chocolate, but it will soften again when warmed.
- Freezing: Yes, you can freeze peanut butter cup dump cake! If you want to save some for later, wrap individual pieces tightly in plastic wrap and then place them in a freezer-safe zip-top bag or container. Freeze for up to 2–3 months. When you’re craving a piece, simply thaw it overnight in the fridge (or on the counter for a few hours). Freezing in single portions makes it easy to grab just what you need.
- Reheating: To recreate that fresh-from-the-oven warmth, reheat slices in the microwave for about 15–20 seconds. The cake will get soft and gooey again, and the chocolate will remelt – yum! You can also warm larger portions in a low oven (say 300°F) for 10 minutes or so. If the cake was refrigerated, I like to let it sit out for 10-15 minutes to lose the chill, then microwave. And if you froze the cake, let it thaw first as mentioned before warming it up.
- Make-Ahead Tips: Because this dump cake is so quick to put together, you usually don’t need to assemble it far in advance. In fact, it’s best baked right before you plan to serve it (so you get to enjoy it warm and melty). However, you can do a few things in advance to save time: for example, chop up your peanut butter cups ahead of time and store them in a container, and measure out your cake mix, milk, etc. so they’re ready to go. If you’re entertaining, you could mix the batter earlier in the day and pour it into the pan, then wait to bake until about 30-40 minutes before dessert time. If you are entertaining, you can mix the batter earlier in the day and pour it into the pan, then refrigerate it until you are ready to bake. Let the batter sit at room temperature for a short while before baking, as cold batter may result in a slightly denser texture. Still, the flavor will be just as delicious.
The Nutritional Benefits
- Peanut Butter Brings Protein and Healthy Fats: Peanut butter is not just tasty, it is packed with nutrients. It offers protein, heart-healthy fats, and vitamins like E and B. Even the peanuts in the candy add a bit of fiber and extra nutrition.
- Milk Adds Bone-Strengthening Nutrients: The milk in the batter gives a boost of calcium and vitamin D. It also contributes protein, helping each slice offer a little bone-supporting nutrition along with its sweetness.
- Eggs Offer Complete Protein and Brain-Supporting Nutrients: Eggs do more than bind the batter. They provide high-quality protein and nutrients like choline, vitamin D, and B12. These nutrients support your body and brain, even in a dessert.
Chocolate Delivers Antioxidants: Chocolate chips and cocoa contain antioxidants that can support heart health and fight free radicals. You can make this chocolate peanut butter dump cake slightly more beneficial by using dark chocolate, which has even more flavonoids.
FAQs
Can I substitute the peanut butter cups?
Yes, you can use chopped chocolate bars, peanut butter chips, or even caramel-filled candies. Choose anything that melts well and pairs nicely with chocolate.
How long does it take to bake?
It usually takes about 30 to 35 minutes in a preheated 350°F oven. Start checking around the 30-minute mark to avoid overbaking.
How do I prevent soggy layers?
Make sure not to overload the chocolate peanut butter dump cake with too many wet mix-ins. Also, bake it until the center is set and the top is no longer jiggly. Let it cool for a few minutes before serving so it firms up slightly.
Can I adjust the sweetness?
Yes, use dark chocolate chips instead of milk chocolate, or reduce the amount of added candy. You can also swap some of the chocolate chips for chopped nuts to balance the flavor.
What’s the best way to serve it?
Serve warm slices with a scoop of vanilla ice cream or a dollop of whipped cream. It also tastes great at room temperature with a cold glass of milk.
Is it suitable for kids?
Absolutely. This peanut butter dump cake recipe is kid-friendly, both in taste and in how easy it is to help prepare. Just keep in mind the candy content if you are watching their sugar intake.

I’m a sweet chef who loves creating irresistible cakes, pastries, and sweet treats. When I’m not baking, you’ll find me experimenting with new flavors, enjoying a good cup of coffee, and sharing my passion for desserts with the world.